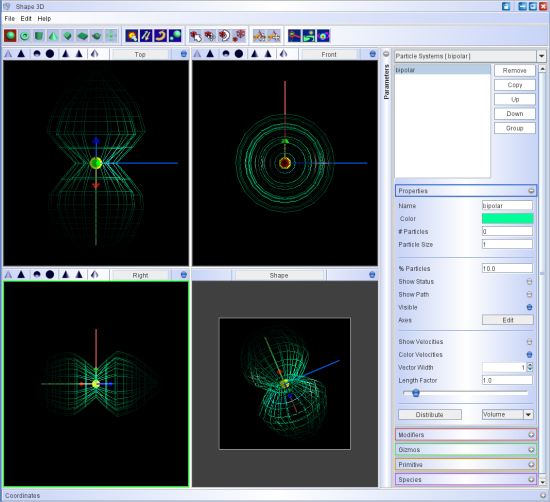
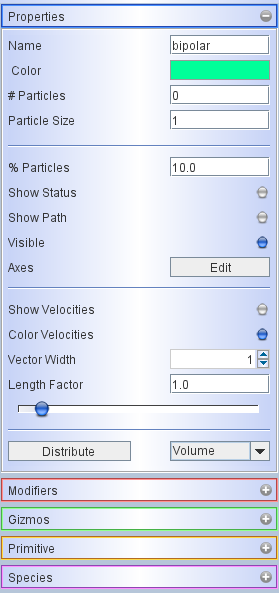
The basic properties of a 3D object include their name and color. These are important to select appropriately in order to identify them in the 3D view and in color renderings in the Render Module.
Next is the total number of particles of this objects. Particles are needed for the particle renderers and the visualization of velocity vectors in 3D views (see below). The Particle Size sets the size of the spot in the 3D views in terms of pixels.
For visualization in the 3D views the large number needed for rendering is often impractical to work with in the 3D views. Therefore, you can set the percentage (%) of Particles that can be displayed. The Show Status button enables to color a selected object white, such that you can see which object is currently selected.
The path of objects that have a path associated with them can be displayed by enabling the Display Path button. See the Path Modifier for more information about how to set and animate the trajectory of an object.
The Visible button controls whether an object is visible, both, in the 3D and in the Render Views.
Each object has its own local coordinate system, which is used to define its modifiers, including density and velocity. You can customize the way the local coordinate axes are displayed. The dialog to change the parameters of the axes open when you click the Edit button to the right of the Axes label. Similar changes can be made to the global coordinate system in the menu bar > Edit > Preferences dialog (at the top of the 3D Module).
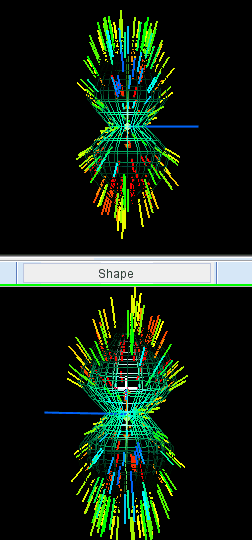
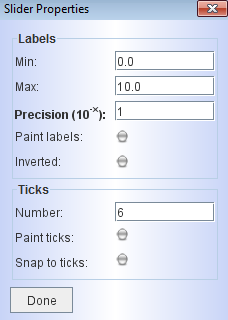
An important feature of Shape is the visualization of the velocity field in the 3D view with vectors attached to particles. The velocity field is set up with the Velocity Modifier. To see these vectors enable Show Velocities. Make sure that there actually are particles assigned and distributed on this object. You can set several parameters of the vectors, like the Color, Vector Width and a Length Factor. When the Color Velocities button is enabled, the colors of the vectors will be according to the Rainbow color settings in the Render Module, i.e. they represent the red/blue shift due to the Doppler-effect as seen in the Shape View (bottom right) of the 3D Module. The Length Factor help to improve visibility of the velocity vectors if they are either too short or too long with the default settings and the applied velocity field. If the default range of the slider is insufficient, then right-click on the slider to open a dialog that allows you to change its limits (see screenshot below).
Particles can be distributed in two different modes: volume and surface. Use the drop-down menu to make your selection and then click on the Distribute button (or use the keyboard shortcut Ctrl-D). When you change the number of particles, you always have to redistribute them. Similarly, when you change the structure of the object mesh, hit Ctrl-D or click on the button to adjust the particle distribution.