From the Shape desktop you manage project files and the appearance of the modules that are in use.
The desktop is divided into two main sections. At the top are the menu and tool bars, from which you will access the modules for rendering, modeling or plotting, among others. Below the tool bar, taking up most of the space, is the module display area, where the modules are shown and arranged in various ways.
Menu bar
From the menu bar you will open create new projects or open and save existing project files via the "File" drop-down menu.

In the "Options" menu you set the time interval between autosave operations and the real-time graphics driver "OpenGL" or "DirectX".
From the "Windows" drop-down you change the arrangement of modules on you desktop between "Cascade" or "Tiles". When in "Tiles" mode you can choose to have 2 or 4 modules visible simultaneously on the desktop.
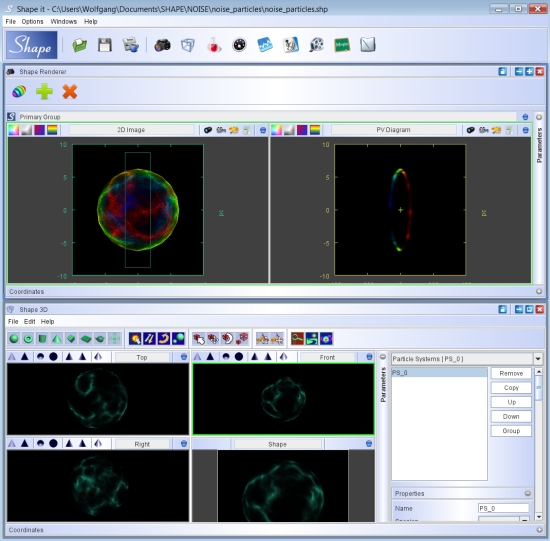 |
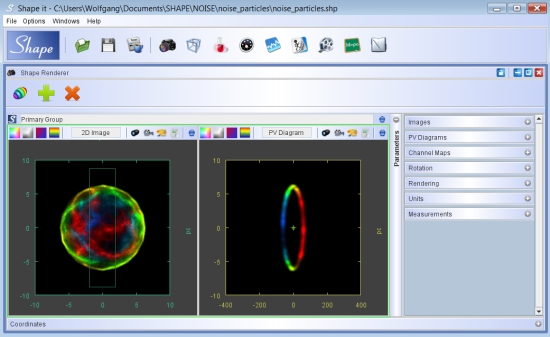
The desktop can show several modules simultaneously.. |
Tool bar
The tool bar has three different sections: the blue "Shape it" button, quick access buttons for project loading and saving and changing to the news panel, as well as the buttons to access the Shape modules.

To render the final image or other information for a 3D model, you click on the large blue "Shape it" button at the left of the tool bar. You can use the Ctrl-s shortcut to activate the same rendering operation while working in any other module.


With the folder and floppy disk buttons you have quick access to "load" and "save" projects functions, which are equivalent to the corresponding options from the menu bar.

The "news" button allows you to switch back to the news page, which is automatically shown at startup of Shape. This news page contains the most recent information on anything related to Shape that is considered of interest to Shape users, including software updates ornew papers with Shape models that have been published.
To the right of the news page toggle button is a sequence of buttons to activate the main modules.
The modules are:
| |
|
|
 |
Rendering module |
Rendering of images and 3D spectral information. Here you can directly compare your images and position-velocity diagrams with observations. Control of camera viewing direction, rendering settings, image and spectral resolution, spectral image filters, spectrograph slit parameters, etc. |
 |
3D module |
Create the 3D structure and basic physical property distributions in this module. Velocity, density and temperature distributions are set here. |
 |
Create module |
With a suitable position-velocity or channel map data set, in this module you can automatically reconstruct a 3D structure of an object. It applies a user defined formula to map Doppler-shift to position along the line of sight. |
 |
Optimizer |
Parameters can be automatically tweaked in this module, based on a quantitative comparison between the rendered model and observed images and position-velocity diagrams. |
 |
Plot module |
The plot module allows you to plot a variety of non-image data, including spectra, light-curves, color-color diagrams, brightness cuts of images, etc. Point-data plots can be previewed in real-time as camera orientation or object structures are changed interactively in the 3D module. |
 |
Animation module |
In the animation module virtually all model and camera parameters can be automatically changed with time. This allows you to produce animated time sequences or movies.They can be used for parameter searches or to simulate time variable phenomena such as complex expanding nebulae, rotating stars with spots or exo-planetary stellar occultations. Rotating camera views can be produced to help with visualization of complex rendered structures. |
 |
Movie player |
The movie player can replay sequences that have been generated with the animation module. This includes not only rendered images, but also pv-diagrams and plot images that have been saved automatically. Several sequences can be reproduced simultaneously. The movie module also allows you to save a sequence or several simultaneous sequences in a movie file that can be reproduced with standard movie players.. |
 |
Physics module |
The physical emission properties of gas and dust are specified in the physics module. These include dust properties like particles sizes and scattering phase functions. Spectral lines and atomic ionization potentials can be set for radiation transport calculations, etc. |
 |
Math module |
In the Math module you can define variables and constants. These may depend on previously defined constants and variables through analytical expression that you can define. They can then be used in one or more analytical graphs throughout the 3D Module. |
 |
Channel maps module |
The Channel Map module renders and displays velocity channel maps or lightecho maps. In this module you set up the image array parameters. Lightechoes are treated as constant light travel time maps, similarly to the channel maps, which are constant radial velocity maps. |
 |
Message module |
In this module most of the software error message and text output messages are displayed. They may help to diagnose problems or to monitor performance. |
 |
Project notes |
The project note pad allows you to add any type of information that you might want to manually add to your project. A basic set of project information is added automatically upon creation of the project. This information is stored in the shape project file as well as in a separate ascii file that can be read with an external text editor. |
Module display area
The large module display is where active modules are shown and arranged. When you activate a module from the tool bar by default it is shown on top of any other open modules filling up the whole space. Clicking on the module buttons in the tool bar you can switch to other modules at any time.
To see more than one module at the same time, you have two options. First, you can choose "Tile" from "Windows" drop-down list of the menu bar. Second, you can separate the window from the Shape desktop to any position on the desktop of your operating system. To separate a module from the Shape desktop you click on the "lock" icon at the top right corner of the module.

To redock a module to the Shape desktop, click on the red "X" button in the upper right corner of the module. Note that the "X" button does not actually close the module, so don't worry about accidentally clicking on this button. The "-" button minimizes the module within the Shape desktop, whereas click on the box icon will maximize the size to the full desktop.